I hope everyone had a great Thanksgiving yesterday! We had a great day at home this year. We fixed a large turkey, all the fixings and spent most of the afternoon outside playing in the yard. We all had fun and then went after it got dark to the drive through Christmas lights that the town puts on every year.
Today the kids and I made our Christmas ornaments for this year. As usual we always do a new ornament every year for Christmas. We either buy one or make them, and this year we did a different type of hand print ornaments.
We got from Hobby Lobby some clear glass ornaments, paint pen and some filling for the ornaments. I painted the kids hands, one at a time, and then they
held the ornament to get their print onto the ornament. After it completely dried I wrote their name and date on their ornament then we filled it with the little white popcorn type filler and some glitter. They all wanted red glitter so it was much easier to fill the all at once. I then used a clear spray paint and coated it with the clear polish to give it a little extra gloss and to make sure the hand prints stay on. I think they turned out great.
Once we get our tree up I'll make sure and post pictures!!
Till Next Time!!!
Showing posts with label craft. Show all posts
Friday, November 23, 2012
Thursday, August 30, 2012
Ribbons and Hair Bows!
Kylie lately has been wanting some hair bows and ribbons so I took the extra ribbon I have lying around the house and took to it to making some hair bows. no I am not a pro at it, but I think they turned out pretty well and the important thing is that the girls love them.
So far I have made them 3 different types of hair bows. I've done the curled ribbon bows, flower bows and then what I call layered puff bows. No I don't know the technical names of them but I can make them. Mackenzie seems to like the curled ribbon ones the best. She pulls her hair up in a pony tail and then puts one in to cover the hair band. I'm not to big on the style of them but I'm not making them for me.
Kylie loves the puffy ones I have made. She especially loves the pink and purple one I made today. I have a feeling she will for sure wear it to school tomorrow with something that is pink and purple. She sure has enough clothes those colors!
Mackenzie loves how I have done the colors of OSU on a few of them since she currently is a big fan of OSU. I'm surprised that they have not asked yet for me to do some more in their school colors which are Red and White. I should do some anyway that way they can wear on game days and spirit days!
When I get some more made I'll try and remember to post the pictures on here so you can see what I have done. Enjoy the pictures I posted below!!
Till Next Time!!
| A few of the hair bows on their bow holder. |
Kylie loves the puffy ones I have made. She especially loves the pink and purple one I made today. I have a feeling she will for sure wear it to school tomorrow with something that is pink and purple. She sure has enough clothes those colors!
Mackenzie loves how I have done the colors of OSU on a few of them since she currently is a big fan of OSU. I'm surprised that they have not asked yet for me to do some more in their school colors which are Red and White. I should do some anyway that way they can wear on game days and spirit days!
When I get some more made I'll try and remember to post the pictures on here so you can see what I have done. Enjoy the pictures I posted below!!
Till Next Time!!
| Mackenzie's Orange Hair Bow |
| The flower hair bow I made. |
| The first puffy hair bow I made. |
| Kylie's Pink and Purple Puffy Hair Bow I made. |
Friday, April 20, 2012
Paint and a butterfly assignment
| The paint before I put the color in it. (THIS IS NOT THE PUFF PAINT!) |
I finally settled on a recipe that I think turned out pretty cool. The recipe we used tonight is as follows:
| Kylie's paint colors, Pink,. Green, Blue and Purple |
| Kylie finishing the first of the paint for her Butterfly |
PAINT RECIPE
Equal parts Flour and Water
Food coloring
Mix the water and the flour together till it is lump free then add the food coloring to desired color. I used the Wilton Gel Food Color, just because that is the only food coloring I use anymore. It's my favorite brand.
| Kylie working on the paint |
Kylie decided to have pink, green, blue and purple as her colors to paint her butterfly. I gave her a brush and one paint at a time and she went to town decorating the butterfly how she wanted it. The best way to describe the end results is the paint ends up with texture on the paper. It reminds me of the texture of pressed paper that you can find in the scrapbook section of craft stores that you can still feel the fibers in the paper. I love it! Kylie thinks its cool how it is rough and it has dark and light in it on the paper.
We let the paper dry completely and she decided she wanted some decorations on it. I looked online and found a recipe for a puff paint. (Some call it 3-d or raised paint) The recipe for it is as follows:
| different angle of the butterfly |
PUFF PAINT RECIPE
1 cup flour
3 tsp baking POWDER
1 tsp salt
Water (enough to make the paint the consistency of pancake batter) I used just under 1 cup of water.
food coloring
| The completed Butterfly!! |
1. mix the dry ingredients till combined
2. add the water till you have the consistency of
pancake batter.
3. add the food coloring till you have desired color.
4. put in either a small squeeze bottle or pastry bag to use to decorate onto paper
5. after you have the paint on the paper pop in the microwave for30-45 seconds to "puff" the paint
I'll admit I do not keep small squeeze bottles or anything like that around the house. I just used the pastry bag and it worked pretty well I think. I just cut off a small tip on the bottom of the bag that was large enough for the paint to come out but not enough it was hard to control.
| Kylie's butterfly face. |
Hope you enjoy and maybe get a chance to try these different paints we used tonight!!!!
TILL NEXT TIME!!!
Labels:
butterfly,
craft,
homework,
Kylie,
paint,
paint recipe,
puff paint
Wednesday, November 30, 2011
Hand print ornaments (The finished project)
| Kylie's in the process of being made. Plus a few of the Stockings and Candy Canes we made. |
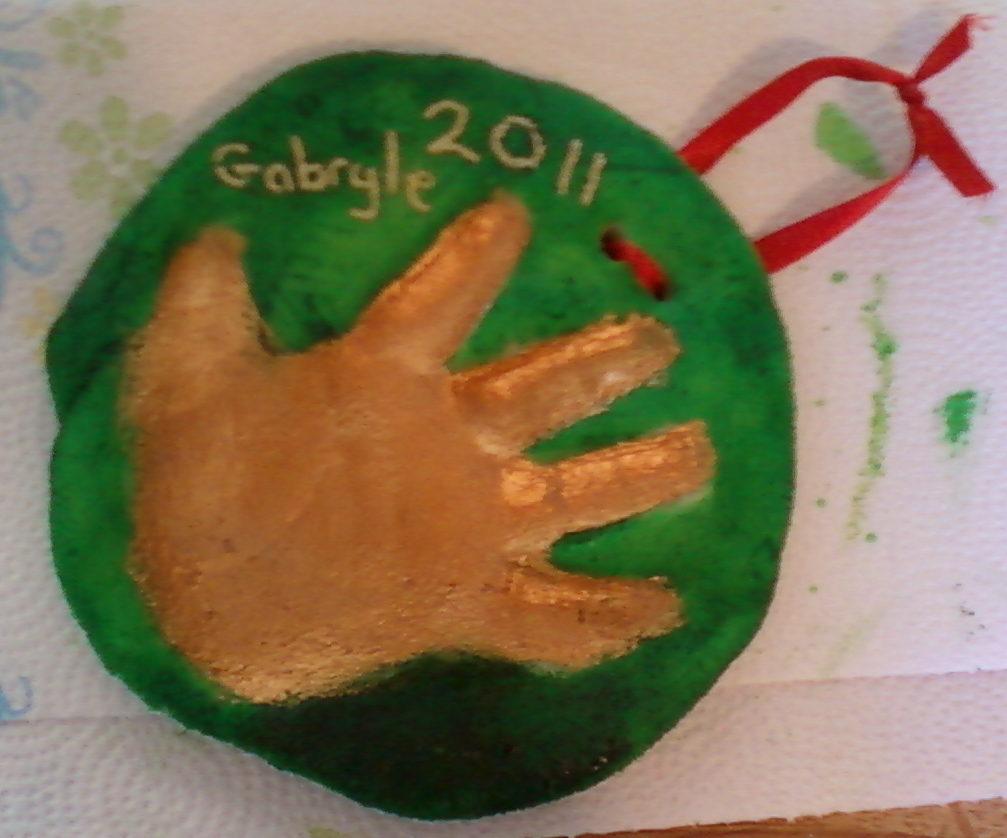
So, we finished our ornaments last night and I think they turned out great! The girls wanted theirs to be red, so I added the red color to the water before adding it to the flour/salt mixture, and I think it turned out great doing it that way instead of painting the color on like I did on Gabryle's. Gabryle's still turned out great even though I painted the green on with watered down food coloring.
| Mackenzie's in the process of being made. |
| Gabryle's ornaments in the process of being made. |
We had quite a bit of extra dough so as the girls hand prints were starting to dry I used some cookie cutters and made some stockings and candy canes. Mackenzie thought that was a great idea. We baked them in the oven for a shorter time than I did Gabryle's and they did not puff up any like a couple of Gabryle's did, which I am thrilled about. I was also afraid that after they dried a little the color would turn more pink than red but they haven't. They have still kept their red coloring without fading. (whether they fade over a long period of time we shall see!)
After they cooled to the touch and had set for a few hours I pulled the paint out and started painting the small little ornaments how I wanted, just to make sure the metallic Gold color looked all right with the red color of the dough. Kylie thought I Was crazy for painting them at first! As those dried I separated the girls hand prints and wrote their names and the year on them with a gold permanent marker then painted the hands.
I haven't had to touch up the paint on the hand prints, which I'm glad about. By the time I was through painting the hands the stockings and candy canes were dry and I was able to check them out better. I think they turned out just as cute as the hand prints.
This morning the hand prints are still a little damp on the back, but I imagine they will dry fairly quickly and be ready for hanging on the tree. I'll recheck the paint in a little bit just to make sure
| The completed Ornaments |
I didn't miss any spots on the hands and that all of
the red is covered in the hand area.
I enjoyed doing this with the kids. It was easy and quick to do, and it uses every day things that most people have in their house to begin with. Once we get our tree up and the ornaments up on the tree I will post pictures so you can see them hanging with all of our other family ornaments.
Till Next Time!!!
Tuesday, November 29, 2011
Salt Dough Ornaments
I came across a recipe today for Salt dough that you can use to make craft projects out of. I have been searching the past few days for a recipe to make homemade hand print ornaments for the kids to do this year for Christmas. Every year we have a tradition of adding 1 family ornament to our collection of ornaments. So far this year we haven't really come across any pre-made ornament that we like, so I thought maybe of having the kids make their own ornaments, by doing a hand print ornament. It'll be a great keepsake, especially once they get a lot older.
I've already tried it out this morning with Gabryle, and did different sizes of dough and I believe I have found the amount that works just right. The ones that were too large ended up bubbling up where Gabryle did his hand print so those were not usable. I found the less dough you can use, the better it turns out. I baked the dough for less time than the recipe called for and at a lower temperature, just to make sure it didn't brown or anything like that.
I think they will make wonderful ornaments once I get the girls home and we do theirs also. I will have Gabryle do another one just to give me another option. He had a blast being able to sit there and mash his hand down on the circle of dough I had him do. I guess he thought he was like Daddy in the kitchen cooking being able to stand up on the chair with me and watching me do what all I needed to do.
When I do our batch later today I will also add a hint of food coloring just to give the dough a little color. I colored the one good one Gabryle had today with some food coloring and I think it just looks better once you add some color to it. I'll post some pictures later once we get our final ornaments done and I have included the recipe for salt dough below.
Till Next Time!!!!
I've already tried it out this morning with Gabryle, and did different sizes of dough and I believe I have found the amount that works just right. The ones that were too large ended up bubbling up where Gabryle did his hand print so those were not usable. I found the less dough you can use, the better it turns out. I baked the dough for less time than the recipe called for and at a lower temperature, just to make sure it didn't brown or anything like that.
I think they will make wonderful ornaments once I get the girls home and we do theirs also. I will have Gabryle do another one just to give me another option. He had a blast being able to sit there and mash his hand down on the circle of dough I had him do. I guess he thought he was like Daddy in the kitchen cooking being able to stand up on the chair with me and watching me do what all I needed to do.
![]() |
| Gabryle's first ornament attempt. This is the test run outcome. |
Till Next Time!!!!
SALT DOUGH
1 1/2 cup all purpose flour
1 1/2 cup salt
3/4 cup water
1.Mix together the flour and salt till well mixed together.
2. Add water and stir until a ball of dough forms.
3. roll out in sections or a flat sheet and cut out shapes or form to desired shape.
4. bake on cookie sheet for about 2 1/2 hours at 375 watching regularly to prevent browning OR let dry for 24 hours.
Labels:
Christmas,
craft,
ornament,
salt dough
Subscribe to:
Posts (Atom)